
Slow flow rate from your pump?
Make sure your pump is clean with our
Pond Pump cleaning advice
A pond pump is the heart of your ponds life support system and the flowrate it achieves will dramatically affect the health and clarity of your pond. To ensure your pump is in tip top condition for the new season we strongly suggest examining it to clean and check for wear and tear. To help with this we have created a simple guide to help you along.
Be safe
Before you start, remember to SWITCH OFF YOUR SYSTEM. This may seem obvious but as well as your pump, it is critical to turn off any ultra violet light within you system, as without running water it would overheat and become damaged.
Don’t loose bits
Once you have removed the pump from your pond you will need to take it out of it’s outer cage. This may involve undoing some clips or removing some screws, so it’s a great idea to have a container to hand to put parts in as they are removed.
Remember where the parts go
If you have ever tried to get an item back into is original box you will remember that sometimes it seams impossible. Pumps can sometimes be like this. To make sure you can put it back together after your pump is cleaned, you can take some photos of how the pump, hose mains cable are arranged inside the cage using your phone or a digital camera before you start. Another great help are the manufacturers exploded diagrams which are in a products user manual, or can be found in the SPARE PARTS section of our website.
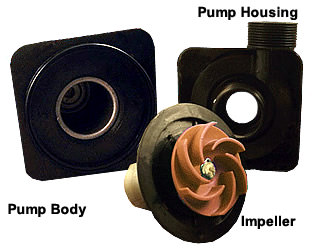
Getting to the important partsAll pond pumps have 4 main parts, the motor body (where the mains cable is connected), the impellor (the part that spins round) and the impellor housing (the part that the hosepipe is connected to) and the outer cage. The impellor will often become clogged with silt, sediment, algae or other debris which should be removed. To remove the impellor you will first need to undo and remove the impellor housing, this is done by either rotating it if it is a bayonet fitting or removing the screws which hold it in place. If you are unsure how to do this, see the user manual for details. |
 |
Getting to the important parts
All pond pumps have 4 main parts, the motor body (where the mains cable is connected), the impellor (the part that spins round) and the impellor housing (the part that the hosepipe is connected to) and the outer cage. The impellor will often become clogged with silt, sediment, algae or other debris which should be removed. To remove the impellor you will first need to undo and remove the impellor housing, this is done by either rotating it if it is a bayonet fitting or removing the screws which hold it in place. If you are unsure how to do this, see the user manual for details.
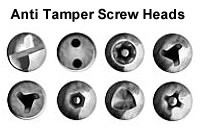
Don’t tamper with anti tamper screwsIf a screw can not be undone with a straight or Phillips screw driver, it is not meant to be removed. A small number of pumps use anti tamper screw and these should not be removed as it may damage the electrical integrity of the pump. |
 |
Check for damage or excessive wear
Fortunately most manufacturers offer a wide selection of PUMP SPARE PARTS, so if something is broken or if the impellor looks worn down, it can often extend the life of the pump if the part is replaced before it cause a total failure.
Cleaning is simple
There is no need to use anything other than clean water to remove the silt, sediment, algae or other debris. Thoroughly clean the motor body recess (where the impellor was fitted), the impellor and the impellor housing.
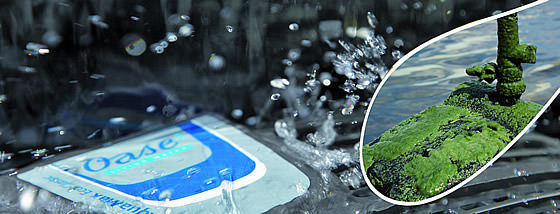
Check for limescaleIn some parts of the country, hard water can cause a layer of limescale to accumulate in and around the pump. Limescale can make smooth surfaces rough, which will cause wear and reduce the pumps performance. If limescale is present soak your pump in a specialist limescale remover such as Oase Aqua Active Pumpclean. |
 |
Hygiene
Finally once your pump is nice and clean don’t forget to wash your hands thoroughly, because as well as cleaning algae and silt, you have also been cleaning fish waste.
Useful Links:
Click here to go to our Pondtec Replacement Parts Page
Click here to go to our Oase Replacement Parts Page
Click here to go to our Hozelock Replacement Parts Page